Documentation
Get Started With Your Own Bucket
For those bringing their own AWS accounts and buckets, there are two parts to setting up Shubox — connecting your Amazon S3 account to Shubox, then integrating Shubox into your website. Let’s go!
Amazon S3 Setup
In order for Shubox to work it’s magic, it needs access to your Amazon S3 account with a few non-destructive permissions.
Step 1: Create an "Identity and Access Management" (IAM) User
Amazon's user management service "Identity and Access Management" (IAM), is how master AWS accounts manage users, groups, and the permissions to work with the different services. We would recommend that each site (and with further granularity - each domain) that works with Shubox to be an IAM user. Let’s make one:
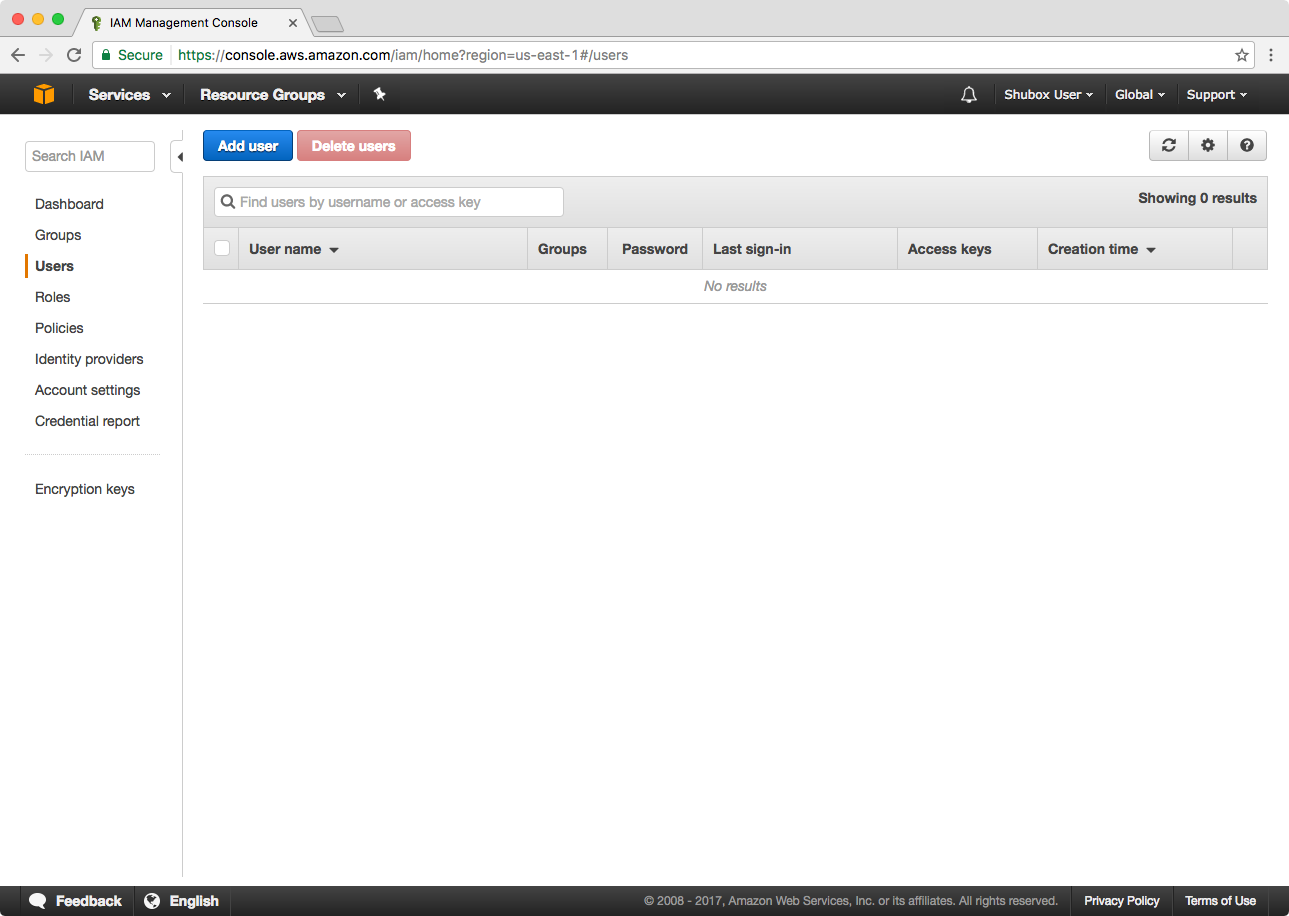
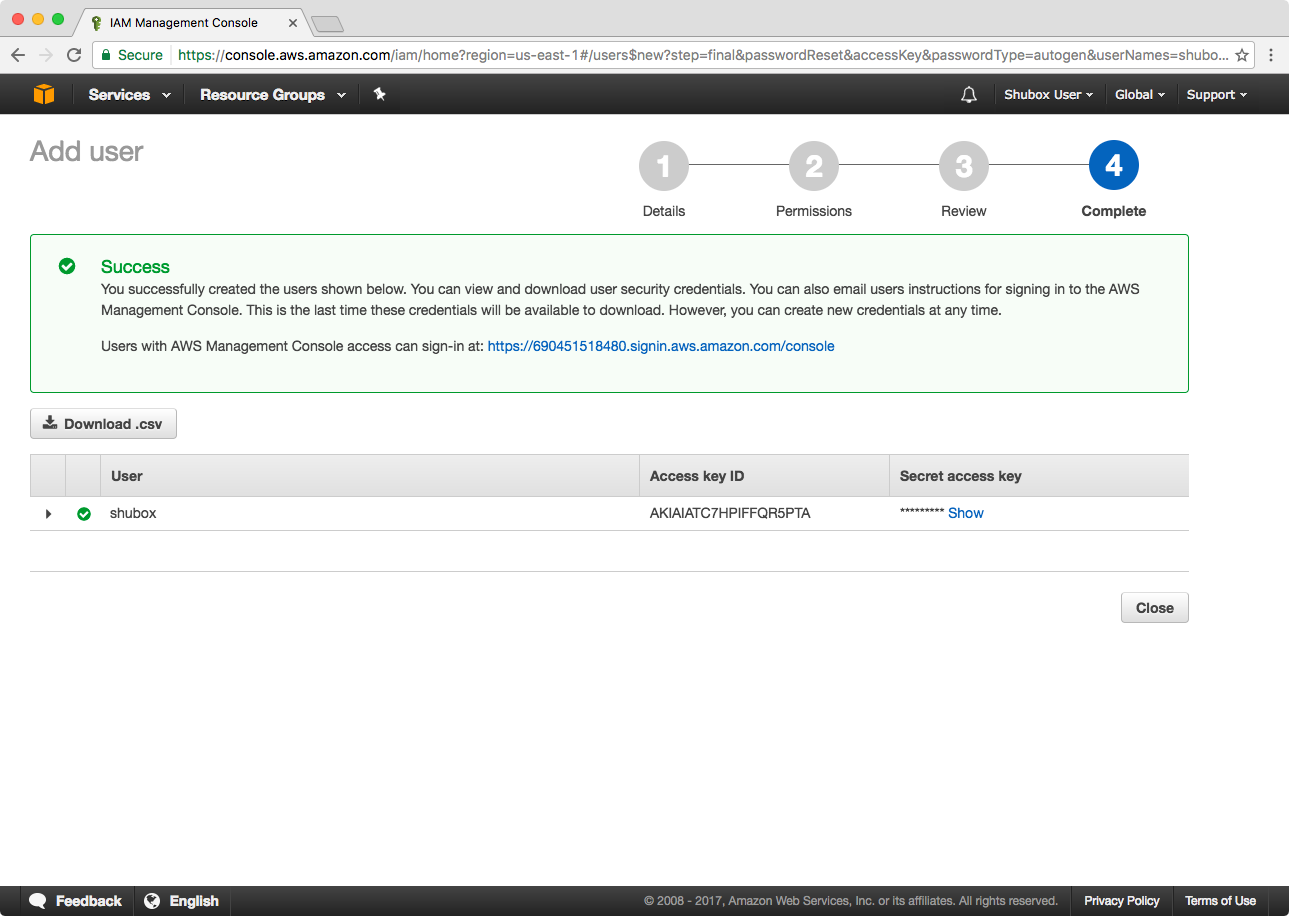
Head over to the “Users” section of your AWS console and hit the “Add user” button:
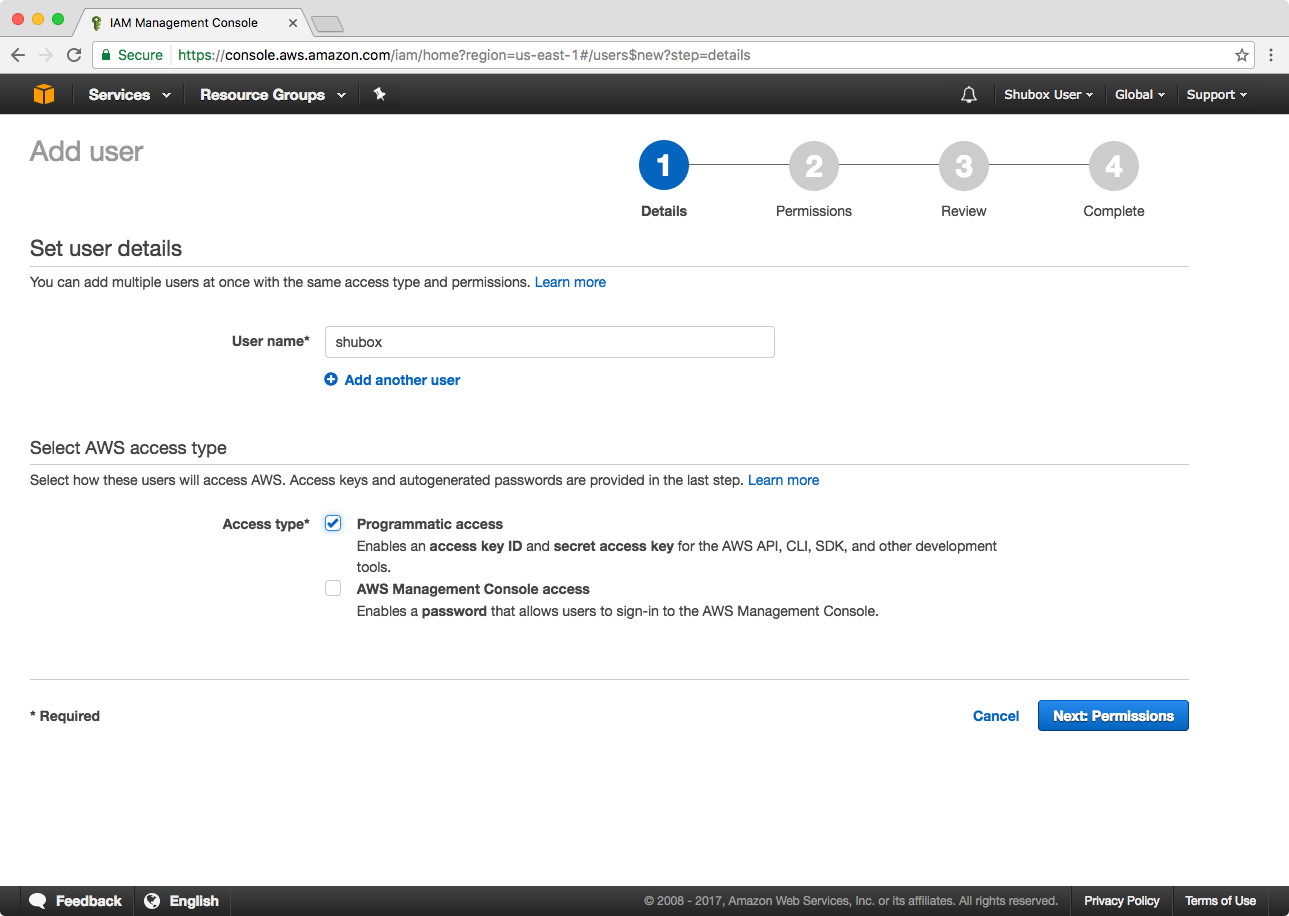
We suggest creating a “shubox” user with programatic access:
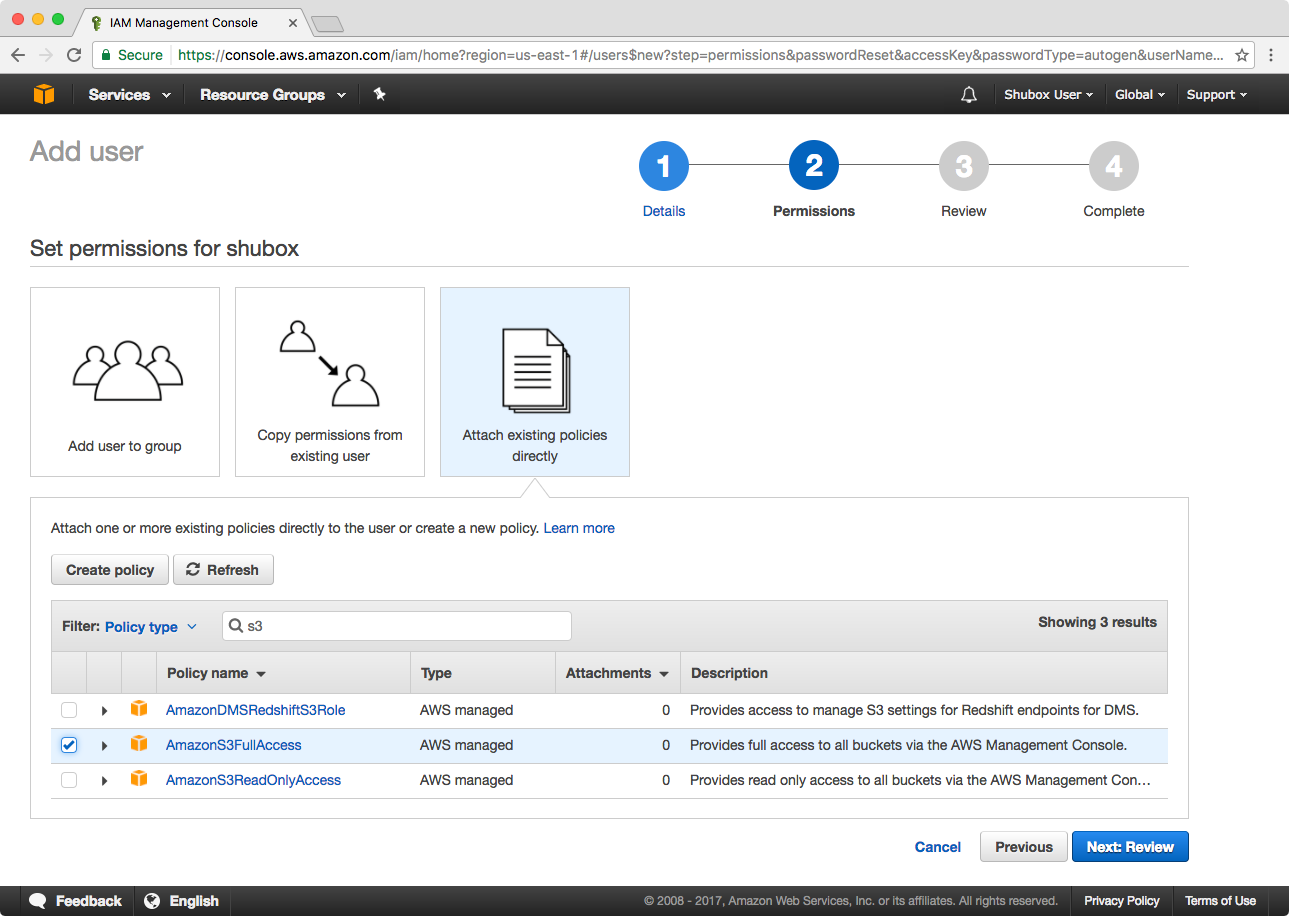
Attach the `AmazonS3FullAccess` policy, then review and create the user:
Not comfortable with granting Shubox full permissions? That’s okay, we only need following permissions to do our work:
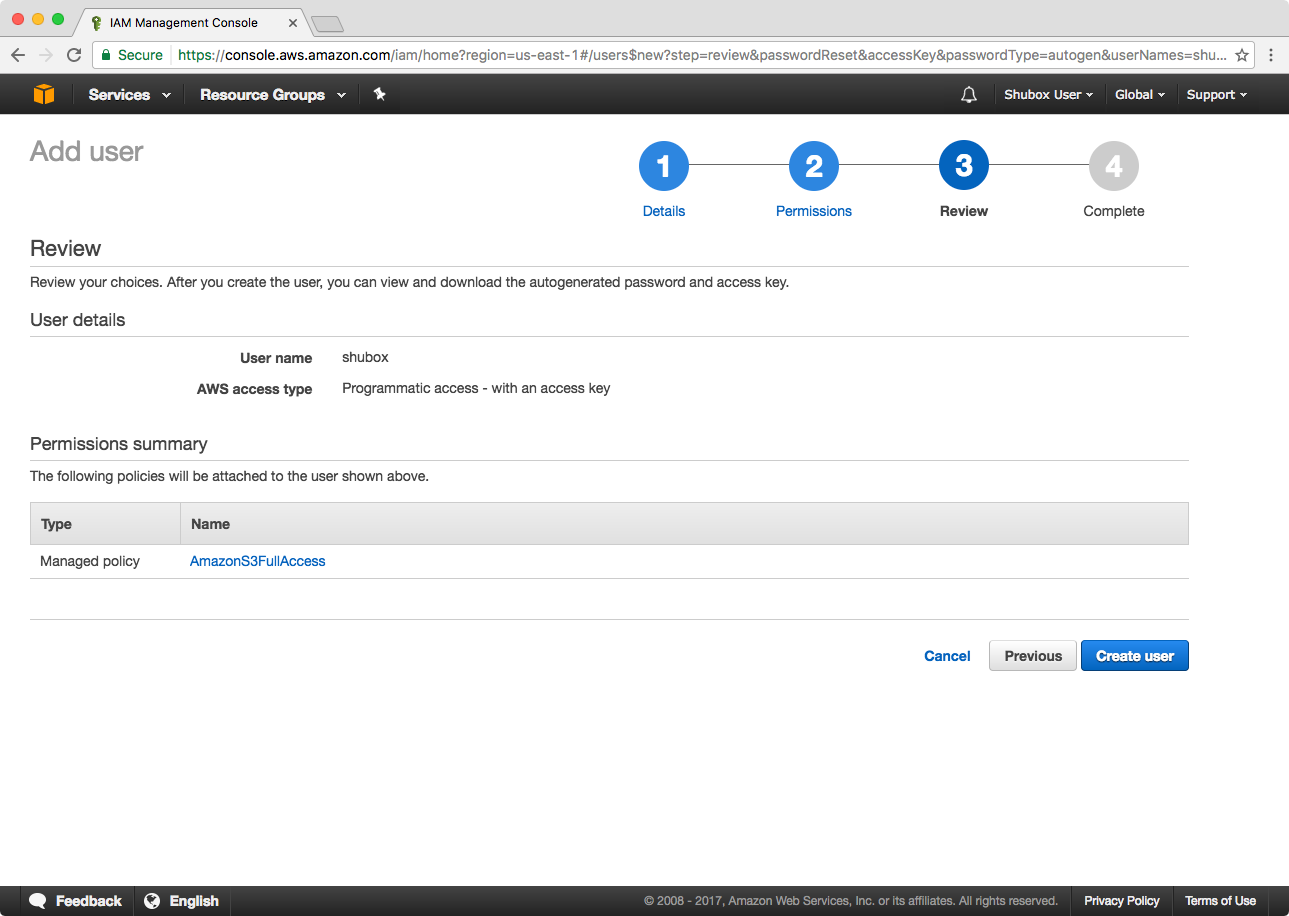
Review and create the user:
Grab your access key id and secret access key:
Connect Your Domain to Shubox
Step 2: Now that your Amazon IAM user is set up, you can head over to your Shubox dashboard and add a new domain. A unique bit of JavaScript will be created for your domain. You’re going to need that next.
Website Integration
It’s time to fire up your editor! We’re going to connect your website to
Shubox. Place the javascript snippet that shubox provided just before
<body> in your HTML template:
    ...
    <script src="/x/abc12300.js"></script>
  </body>
</html>
Initialization
Now all we have to do is bind Shubox to a form element:
<script type="text/javascript" charset="utf-8">
  // with no options
  new Shubox("#dragndrop");

  // with custom options - note: `optionKey` is just an example
  new Shubox("#dragndrop", { optionKey: 'option value' });
</script>
Customization
From here you can use our JavaScript API to create the file uploader of your dreams. If you’d rather get started fast, check out our example/demo uploaders here or on codepen. Feel free to incorporate those into your project, customize them, or use them to learn the ropes.
Local Development with Development Sandboxes
To make local development as "quick to victory" as possible we've created what we call development sandboxes. To view the installation instructions for your own account, visit your dashboard and follow the steps outlined there.
Development Sandboxes are S3 buckets we've created, for you, under our own Shubox umbrella that are configured for immediate use with the usual development addresses:
localhost:*127.0.0.1:*0.0.0.0:*
NOTE: sandboxes are for quickly testing the JavaScript library and getting a feel for how Shubox file uploads work and feel. Image transforms are not enabled for the sandbox. To test image transforms you would have to set up a specific domain for your environment(s).
Image Transforms
Image transforms are operations defined in the dashboard that occur on all images uploaded through your configured Shubox element. An image transform consists of 1 or more processes where you define what happens to an image after it is uploaded. That could be a single new image size created, several different image sizes, or more.
Available Image Transforms Processes
Currently:
-
Resize images using the geometry conventions with ImageMagick. Currently supported geometries:
300- resize to width.x400- resize to height.340x400- max width and height.340x400^- minimum width and height.340x400#- cropped to this size.340x400!- explicitly this size.340x400>- shrink if larger than size.
- Optimize JPGs and PNGs using, advpng, gifsicle, jpegoptim, jpegtran, optipng, pngcrush, pngquant, and pngout.
- Convert JPGs and PNGs to WebP, and JPEG 2000 format.
- Convert animated gifs to MP4, WebM, or both!
- Auto-orient rotation in photos (usually) taken with cell phone cameras.
- Strip EXIF data from uploaded photos.
- Extract single frame from the middle of an animated gif.
New Files Resulting From Image Transforms
After images are uploaded to S3 and are put through the assigned image transform process queue, the resulting files are uploaded back to S3 alongside the original file in the same, original, directory. The resulting files are named with a prefix according to the process applied to them. The prefixes related to the above processes are.
-
ORIGINAL.JPG. The original file, if the auto-orient or EXIF stripping processes are applied, will remain the same but will have either/or process applied. -
[Provided Imagemagick Geometry]_ORIGINAL.JPG. Where "Provided Imagemagick Geometry" is what was assigned for the value(s) under "Image Sizes". Eg: 100x100! would result in 100x100!_ORIGINAL.JPG. -
frame_ORIGINAL.gif. Animated gifs that have a frame extracted will have a frame_ prefix.
Setting Up an Image Transform Queue
Step 1: A functional Shubox upload
Step one is to make sure you have a functional Shubox element accepting uploads to your bucket.
Step 2: Set up the image transform in your dashboard
In your dashboard, create a new image transform. Give it a name, select the domains that should be able to run the transform, and select the processes and image sizes that should be generated after images are uploaded. Save your image transform and you are almost there. Last, but not least ...
Step 3: Update your Shubox element's HTML
For Shubox to know that any uploadable element must put each
uploaded image through the image transform queue that you have defined above,
you must initialize your Shubox JavaScript object with the
transformName option being assigned the name of the image
transform you have created in the dashboard.
Here is an example, with HTML and JS, before setting up an image transform:
<div id="avatar"></div>

<script>
  new Shubox("#avatar");
</script>
And if we've created an image transform called "avatar-transforms", we would enable it with the following:
<div id="avatar"></div>

<script>
  new Shubox("#avatar", { transformName: "avatar-transforms" });
</script>
Plan Details
There are some limitations based on what plan you are using. If you have an account in our app you are using our FREE plan. With it you get:
- Unlimited support for domains you set up with Shubox
- 500 event credits per month, where:
- An uploaded file/image is 1 credit
- The processors used in image transforms each count as one credit. EG: A transform with 3 image resizes count as 3 credits every time an image is uploaded and run through that transform queue.
- Uploaded files are capped at 3 megabytes
The Uptick plan is the same as the above except you get:
- 2,500 event credits per month
- Uploaded files are capped at 20 megabytes
And the Up Up & Away plan:
- 10,000 event credits per month
- Uploaded files are capped at 20 megabytes
- New pro/premium/super-duper features will roll out for all "Up, Up & Away" plan subscribers first — because "thank you" for your support!
Set Up Your Shubox Bucket
Visit the bucket subscription page and choose what size/plan bucket you would like. Information on each plan is available on that page.
On your subscriptions page, there will be a link to create your first bucket. Visit the form, where you will be able to select:
- ACL (private or public)
- Region
- A list of domains you would like to have access via the JS SDK
JavaScript Api
Methods
sending:
The sending callback is called just before each file is sent.
It receives file[1], xhr,
and formData objects. This allows you to modify any or all of
these object before they go in flight to your endpoint (to add headers, etc).
sending: function(file, xhr, formData) {}success:
Assign a function to the success key that accepts a
file parameter which will be run after files are successfully
uploaded. More information about the File type passed into
this function can be found below.
success: function(file) {}error:
Assign a function to the error key which accepts a file object and an error string and it will be run when errors are incurred with a file upload.
error: function(file, message) {}queuecomplete:
The queuecomplete callback will be called when all files are finished uploading.
queuecomplete: function() {}Parameters
s3urlTemplate:
When uploading to a form element, the element's value will be
changed to the URL of the uploaded file, which is, according to the
default value of this option, a handlebars-like representation of
the S3 URL - ''.
This can be changed to any string, and if it has the
'' string anywhere within it, it will be
interpolated with the final uploaded file's address. Example, to
instead insert markdown's image pseudo code you would change this to
'![alt text]()'.
s3urlTemplate: ''textBehavior:
When uploading through a form element (<input>,
<textarea>, etc) the behavior, by default, will be
to 'replace' the contents of the form element value with
the URL to the newly uploaded file.
Changing the value to 'append' will append the resulting
value from the newly uploaded file to the form element.
textBehavior: 'replace' // default valueclickable:
Any element initialized with Shubox will, by default, trigger the file dialog when clicked.
Setting this to false will turn it off, but will still
allow dragging and dropping into the element.
Changing the value to a valid CSS selector pointing to another element will allow that other element to trigger the file dialog instead of the main target element Shubox is initialized with. For a more comprehensive example see this blog post for a common use case where this is utilized.
clickable: true // default valuepreviewTemplate:
Because much of the JS under the hood is handled by the excellent
dropzone.js javascript library
Shubox makes use of its conventions where it makes sense. The
previewTemplate option takes a string containing an html
template which Dropzone will use to render a preview image for each
dropped image. For more information on how to theme the elements
generated by the default string
you may
visit the DropzoneJS website and get an idea for what you can do
by "theming" the resulting UI.
var myTemplate = '<div class=\"dz-preview dz-file-preview\">' +
  '  <div class=\"dz-details\">' +
  '    <div class=\"dz-filename\"><span data-dz-name></span></div>' +
  '    <div class=\"dz-size\" data-dz-size></div>' +
  '    <img data-dz-thumbnail />' +
  '  </div>' +
  '  <div class=\"dz-progress\"><span class=\"dz-upload\" data-dz-uploadprogress></span></div>' +
  '  <div class=\"dz-success-mark\"><span>😄</span></div>' +
  '  <div class=\"dz-error-mark\"><span>😩</span></div>' +
  '  <div class=\"dz-error-message\"><span data-dz-errormessage></span></div>' +
  '</div>'

new Shubox('#my-selector', {
  previewTemplate: myTemplate
});
previewsContainer
Defines where to display the file previews. If null the
target Shubox element itself is used. Can be a plain HTMLElement or a CSS
selector. A demo that uses this can be found on CodePen here.
previewsContainer: null // the default
previewsContainer: '#selector'
previewsContainer: document.querySelector('#dom-element')
extraParams:
Shubox provides a mechanism with which to post custom data via an AJAX webhook to any address of your own choosing whenever files are uploaded. This will allow you to share any information available during your users' session. The information within the `extraParams` hash will be sent to your webhook endpoint along with the data from the uploaded file.
As an example, you may want to send data about the uploaded file(s) with a user's ID or email. It's not uncommon to want to know who is uploading a particular file.
extraParams: { // defaults to empty object
  userID: 123,
  userEmail: 'team@shubox.io'
}
acceptedFiles:
If you only want certain file types allowed to be uploaded, you may
provide a list of mime types or extensions. The contents of the option may
include a comma separated list of mime types or file extensions. Eg.:
acceptedFiles: "image/*,application/pdf,.psd"File Object
Upon successful upload of an image the Shubox library will pass a file object to all JavaScript callbacks. The format of this file object follows:
{
  accepted: true,
  custom_status: "ready",
  name: "my-upload.jpg",                          // filename w/ext
  width: 281,                                     // in pixels
  height: 500,                                    // in pixels
  size: 15596,                                    // in bytes
  lastModified: 1446064073000,
  lastModifiedDate: Sun Jan 1 2016 00:00:01 ...,  // Date Object
  postData: {
    AWSAccessKeyId: "...",                        // AWS Key
    Content-Type: "",
    acl: "public-read",
    key: "path/to/file/in/bucket/filename.jpg",
    policy: "...",                                // policy string
    signature: "...",                             // signature string
    success_action_status: "201"                  // HTTP response code
  },
  processing: true,
  s3: "path/to/file/in/bucket/filename.jpg",
  s3Url: "https://bucket.s3.amazonaws.com/path/to/file...",
  status: "success",
  type: "image/jpeg",
  upload: {
    bytesSent: 999,
    total: 999,
    progress: 100
  }
}